
Sonoff IoT Switch using Mosquitto MQTT and Arduino ESP8266
Having said that, this is the method I'd recommend for doing your own initial exploration of the Sonoff-MQTT-OTA-Arduino firmware. Once you've completed the initial installation of the firmware, take a few minutes while the USB<->TTL converter is still connected and use the Arduino-IDE "Serial Monitor" (under the "Tools" pull-down.
Sonoff Touch wont flash · Issue 220 · arendst/SonoffMQTTOTAArduino
Provide ESP8266 based itead Sonoff with Web, MQTT and OTA firmware using Arduino IDE - Now EOL - Releases · arendst/Sonoff-MQTT-OTA-Arduino
Sonoff IoT Switch using Mosquitto MQTT and Arduino ESP8266
{"payload":{"allShortcutsEnabled":false,"fileTree":{"sonoff":{"items":[{"name":"_releasenotes.ino","path":"sonoff/_releasenotes.ino","contentType":"file"},{"name.
Sonoff IoT Switch using Mosquitto MQTT and Arduino ESP8266
Boilerplate and tutorial for reprogramming the Sonoff WiFi wireless mains switch using Arduino IDE. Feature include OTA and control with HTTP, MQTT, Blynk.. more complex solution can be found here Sonoff-MQTT-OTA-Arduino. That project, as nice as it is, did not hit a nerve with me, and I thought that maybe a simpler version would be better.

Boilerplate and tutorial for reprogramming the Sonoff WiFi wireless
Provide ESP8266 based Sonoff by iTead Studio and ElectroDragon IoT Relay with Serial, Web and MQTT control allowing 'Over the Air' or OTA firmware updates using Arduino IDE. Current version is 3.2.13 - See sonoff/_releasenotes.ino for change information.
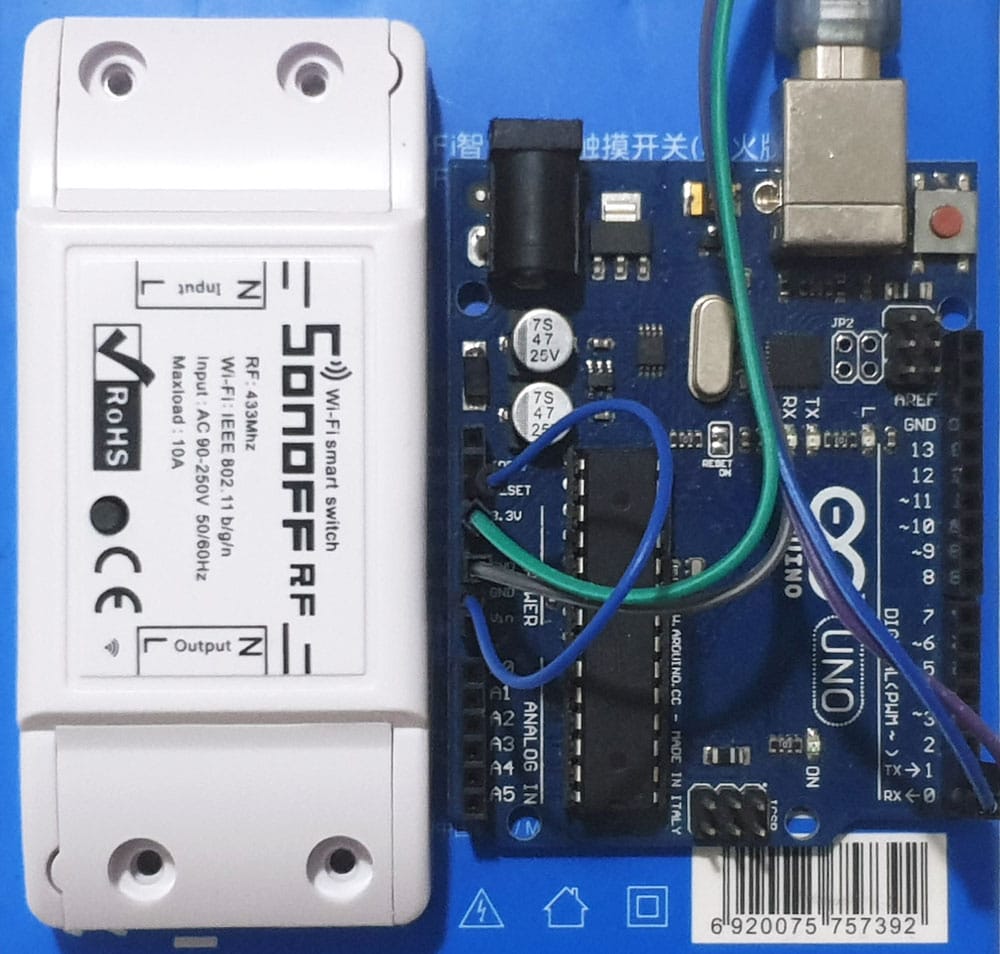
How to flash Sonoff devices using Arduino UNO Make it More Fun
Provide ESP8266 based Sonoff by iTead Studio and ElectroDragon IoT Relay with Serial, Web and MQTT control allowing 'Over the Air' or OTA firmware updates using Arduino IDE. \n Current version is 3.2.13 - See sonoff/_releasenotes.ino for change information.
Programmare Sonoff basic con Firmware Tasmota usando Arduino UNO
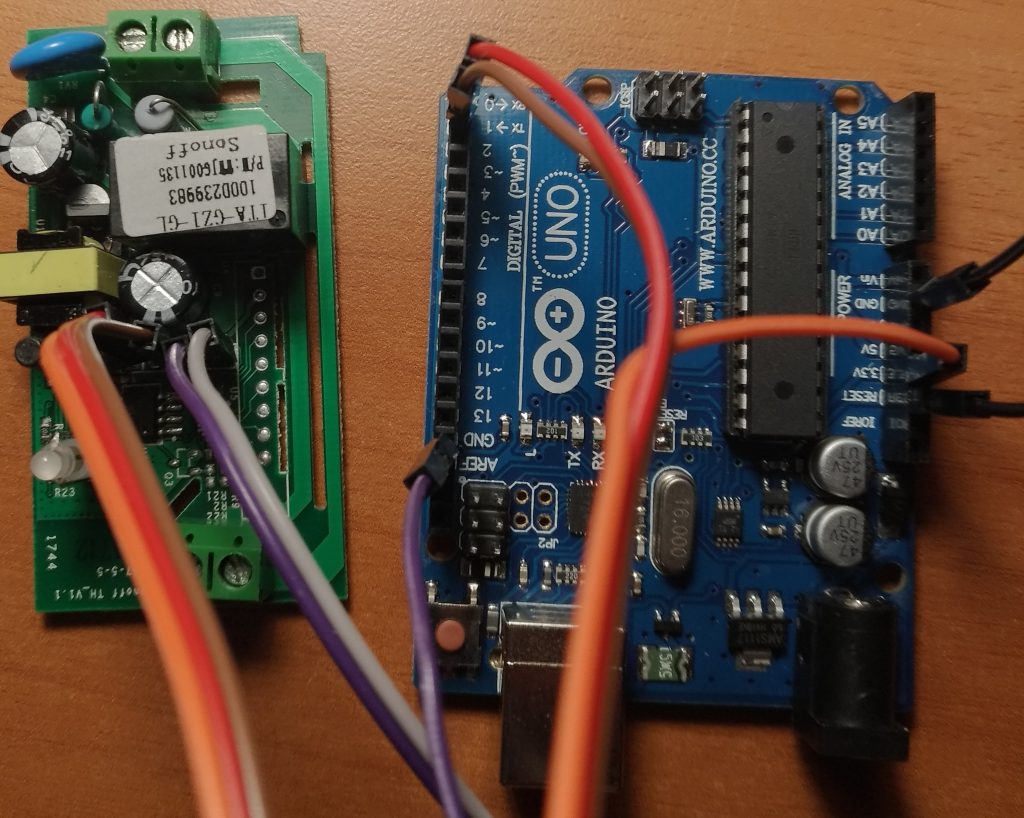
Load the file sonoff.ino into the IDE. Update user_config.h with your specific MODULE (SONOFF, SONOFF_2, SONOFF_POW, MOTOR_CAC or ELECTRO_DRAGON) until version 4, Wifi and MQTT parameters. Verify and/or compile the project and upload once to your sonoff using the serial connection as shown in Peter Scargill's blog. See below for specific Sonoff.

IOT Home Automation Control Sonoff with Home Assistant & Alexa with
But that's just the beginning: using a USB-serial converter and the Arduino IDE, you can load your own software on the Sonoff and make it do your bidding. I used the Arduino IDE to load a sketch with MQTT support and OTA (over the air) updates, allowing it to be controlled by OpenHAB. Start by adding ESP8266 support to the Arduino IDE by.

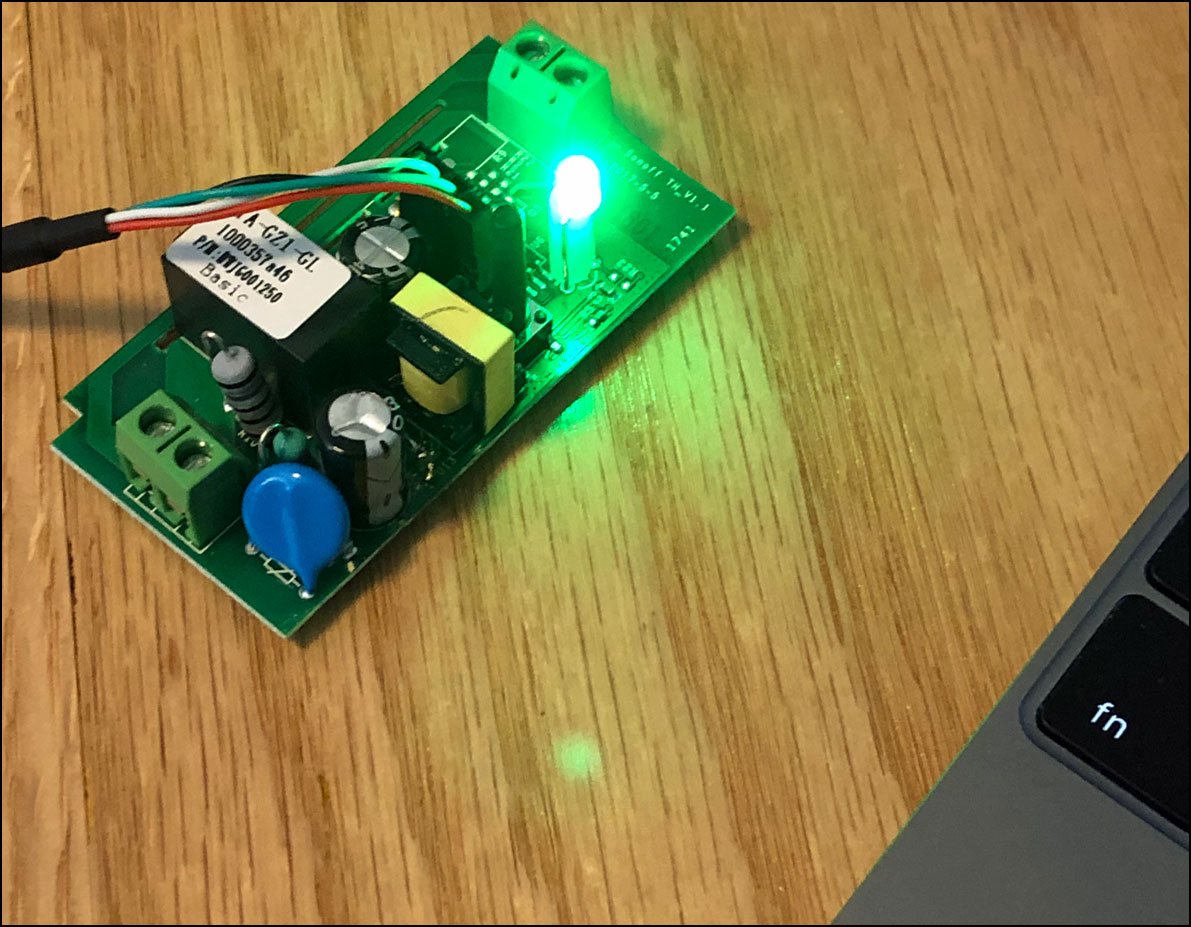
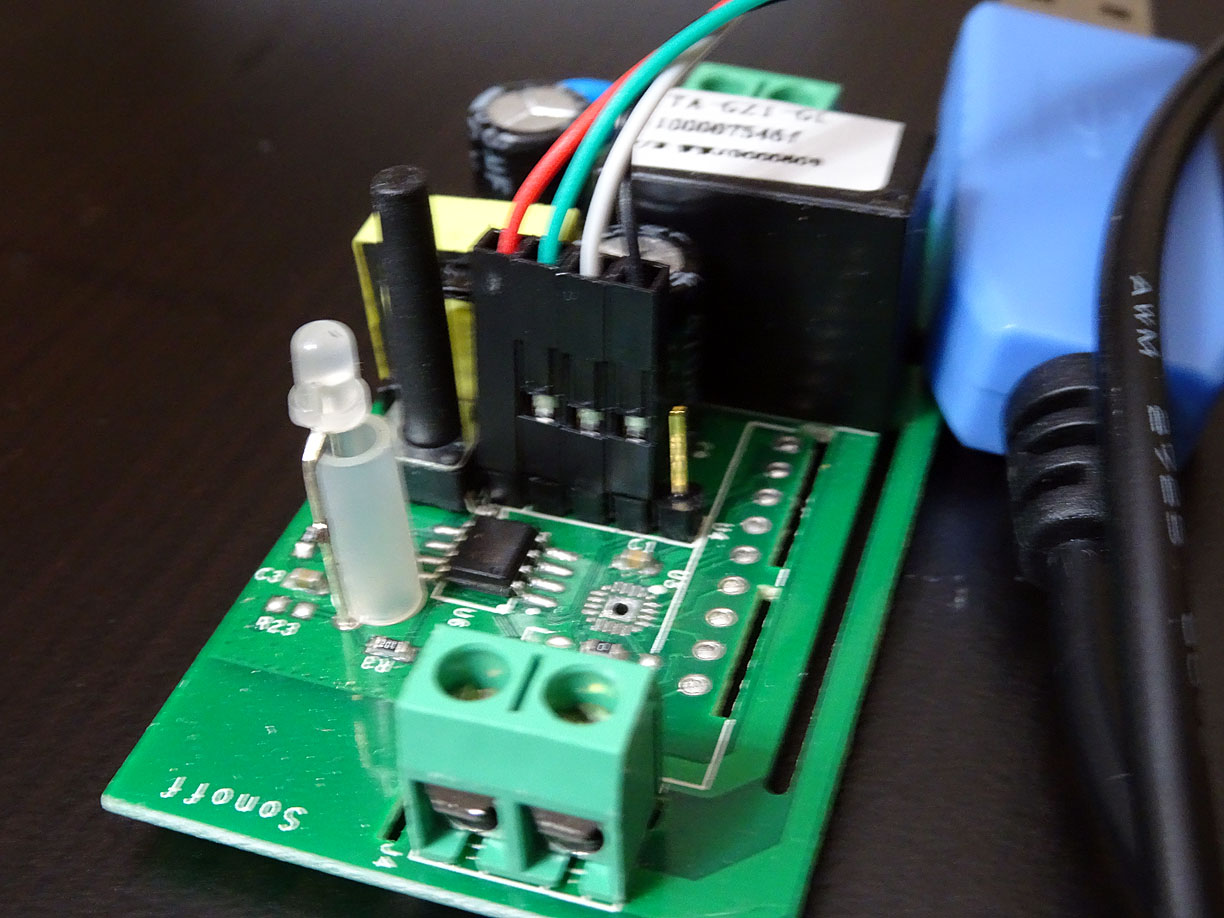
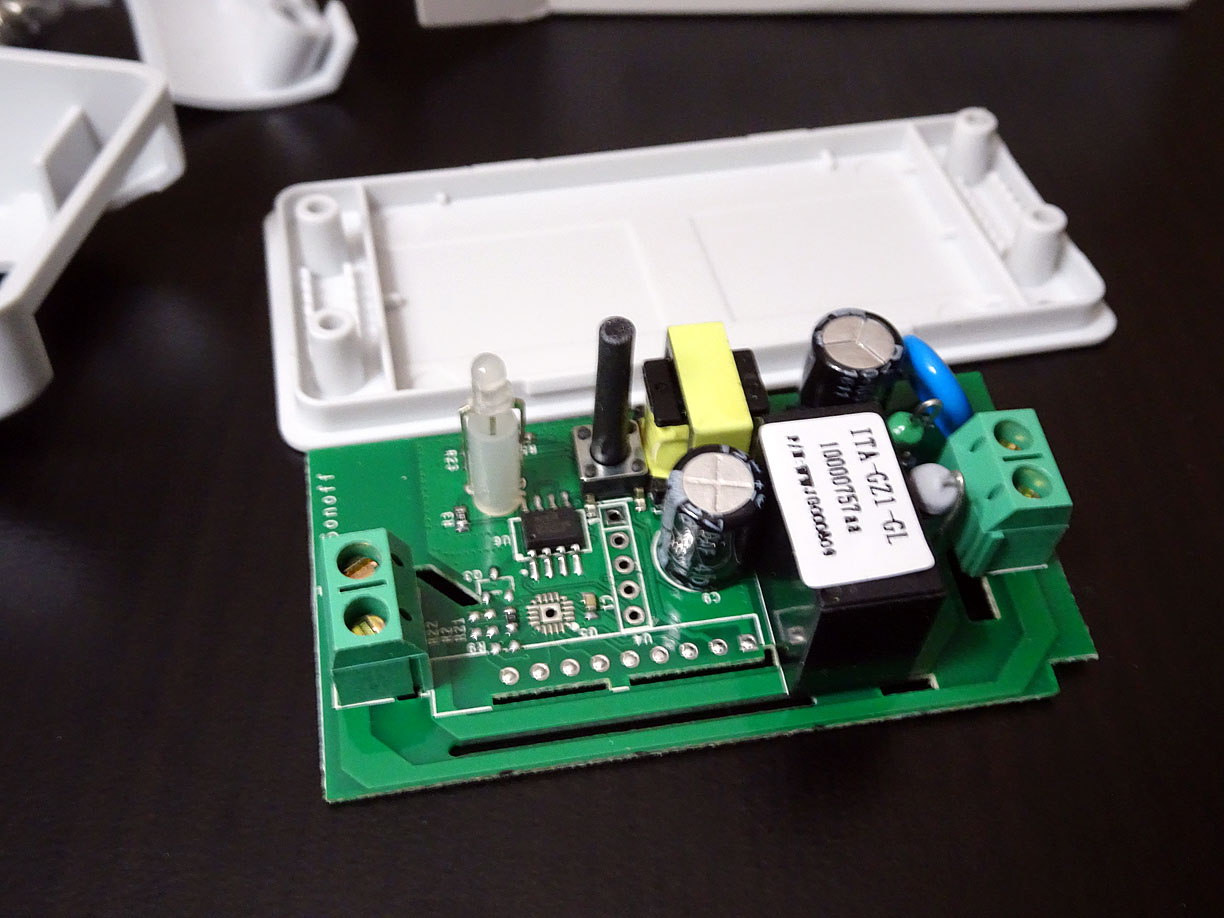
sonoff with header soldered Arduino, Wifi wireless, Firmware
Sonoff-MQTT-OTA-Arduino - TASMOTA. Provide ESP8266 based Sonoff by iTead Studio and ElectroDragon IoT Relay with Serial, Web and MQTT control allowing 'Over the Air' or OTA firmware updates using Arduino IDE. Supported devices. Version 2.0 and up support the following devices with Serial, Web and MQTT control:

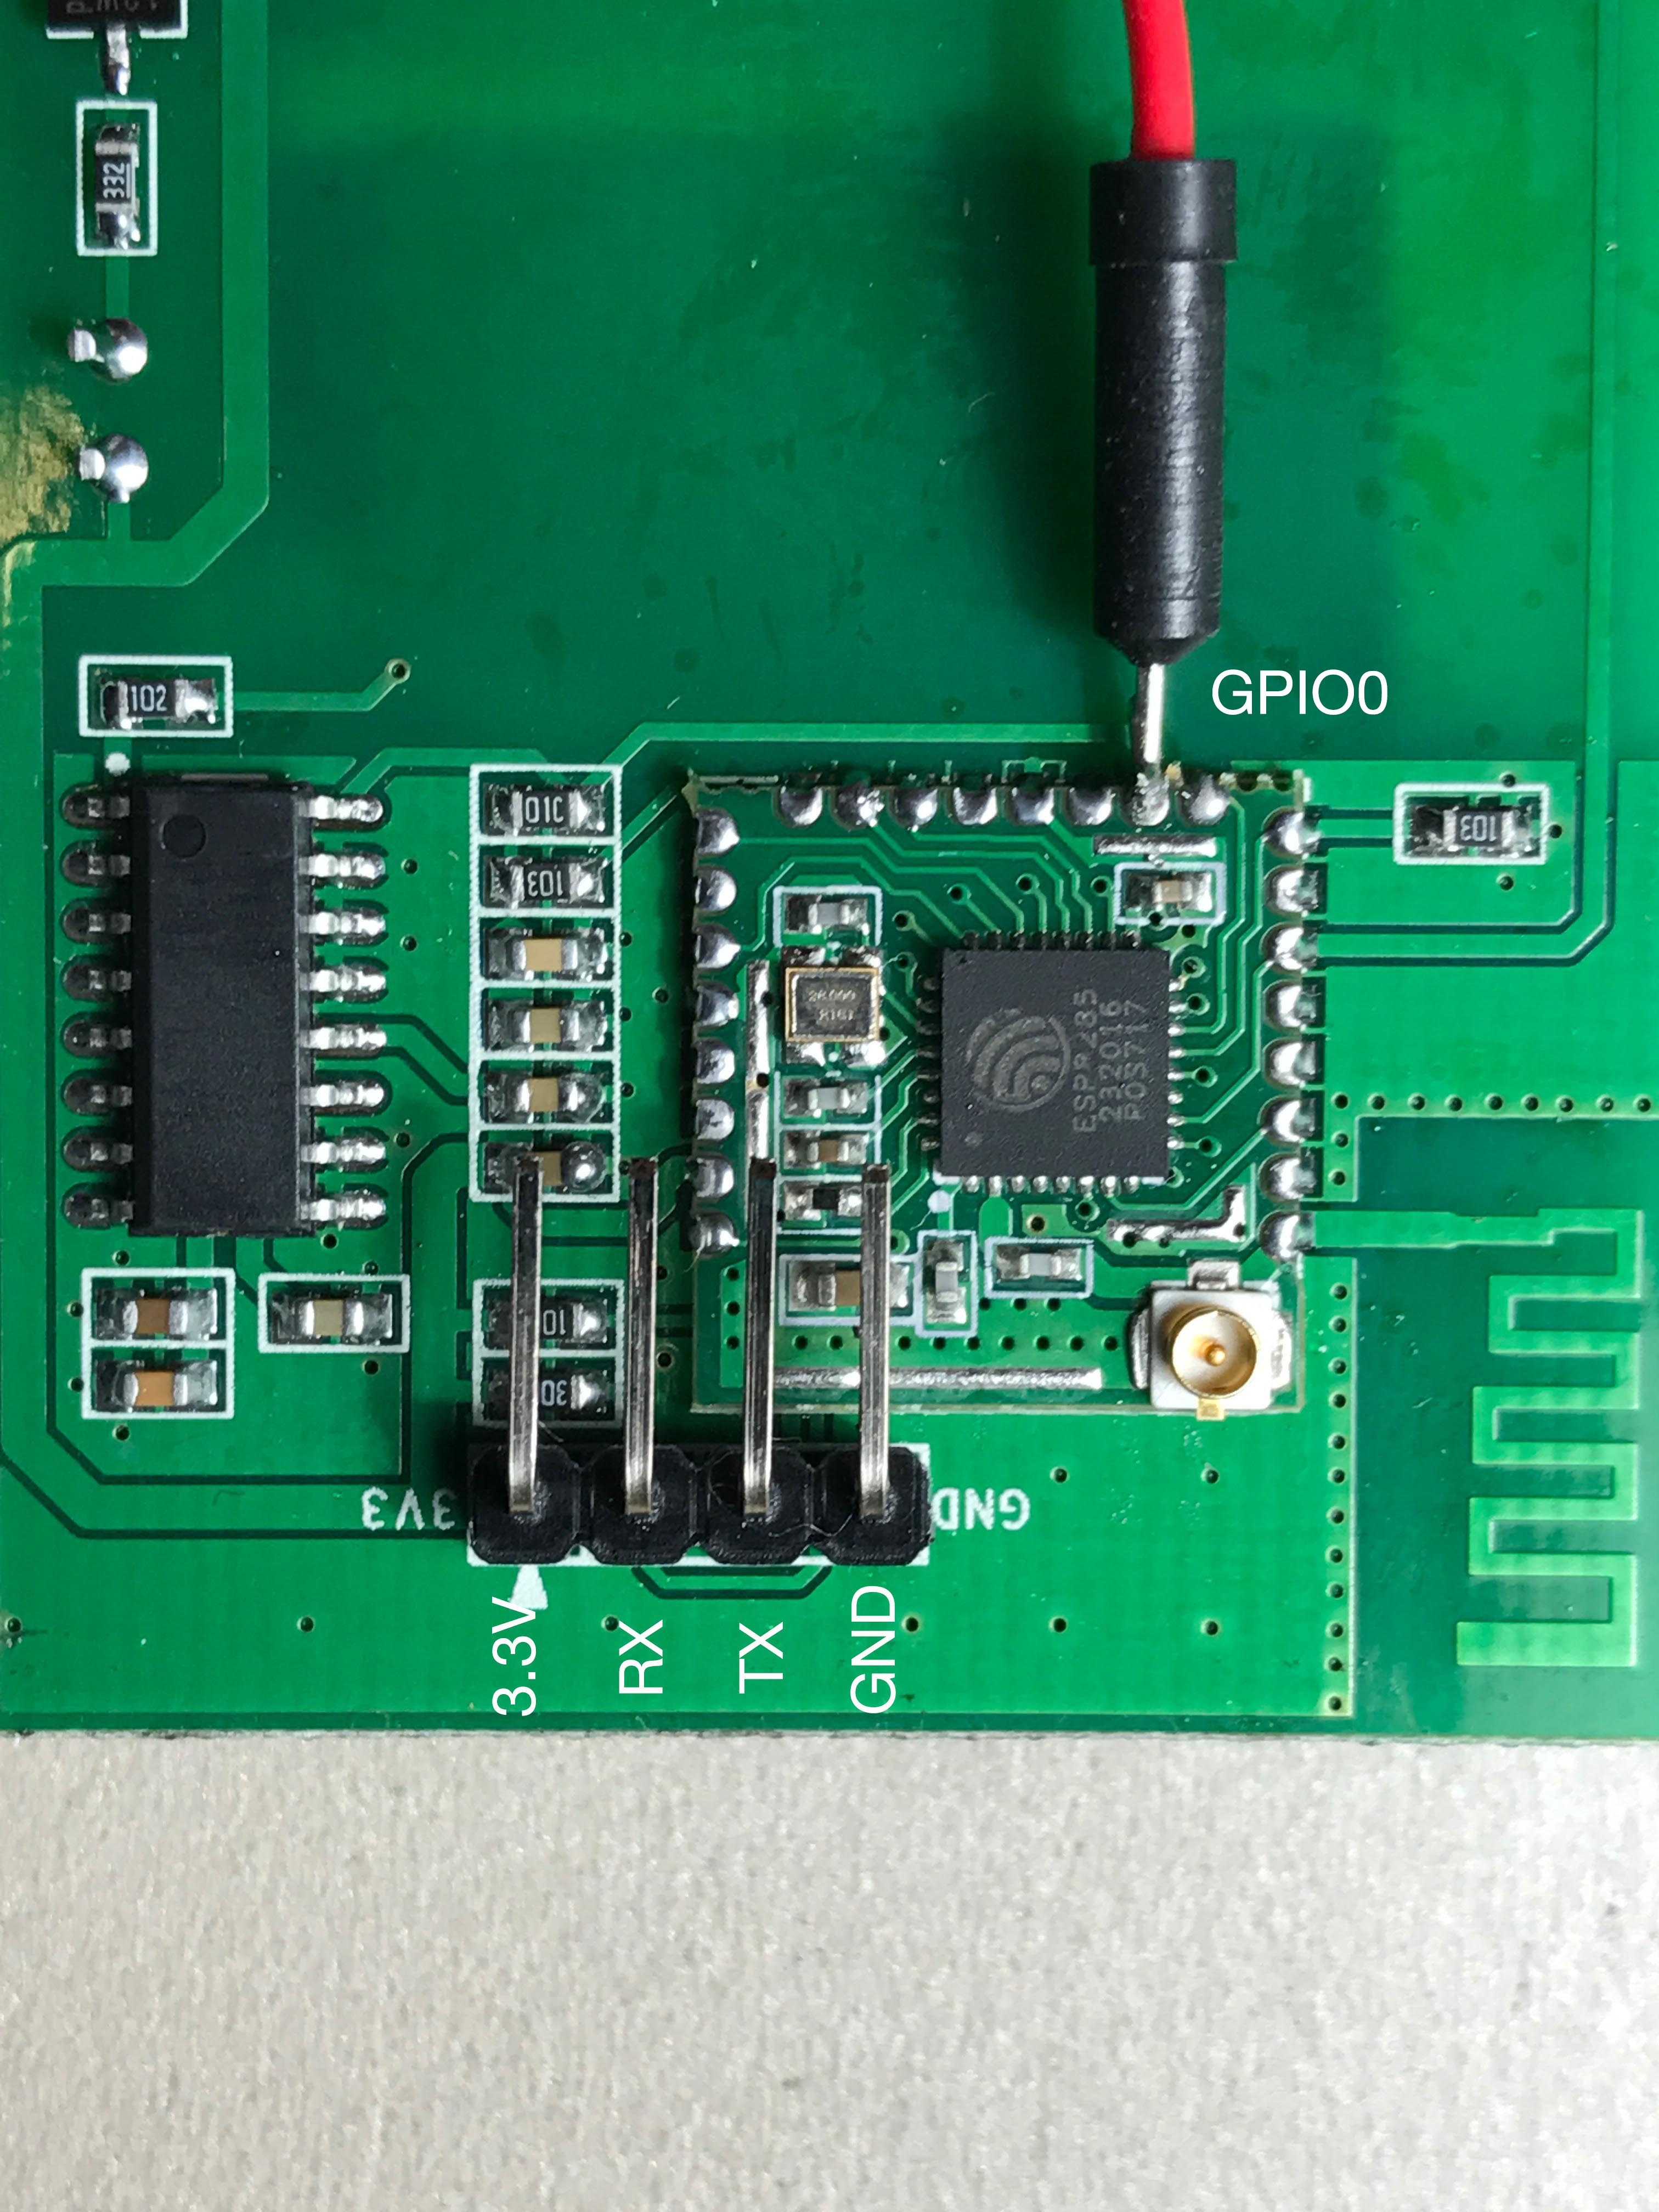
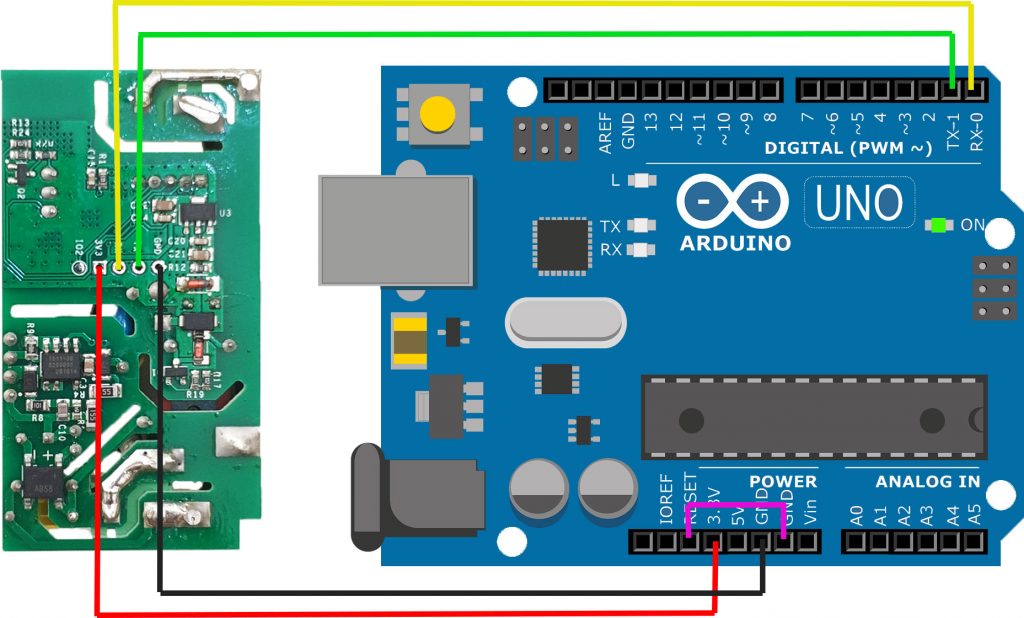
GPIO, 3.3v, rx, tx, gnd position on sonoff inching/selflocking switch
No migration is possible from original Sonoff-MQTT-OTA to Sonoff-MQTT-OTA-Arduino v1.0.11. DO NOT ATTEMPT TO UPGRADE VERSIONS PRIOR TO v7.x STRAIGHT TO THE CURRENT VERSION Remember that you must take each individual step between the device firmware version and the latest available.You can find all the required binaries in Tasmota Releases.
SonoffMQTTOTAArduino/webserver.ino at master · arendst/SonoffMQTT
From Tasmota wiki. The Sonoff Pow can provide Energy, Power, Voltage and Current information in different ways. Message | Unit | Description -----|-----|----- Yesterday | kWh | Total Energy usage between 00:00 and 24:00 yesterday Today | kWh | Total Energy usage today from 00:00 until now Period | Wh | Energy usage between previous message and now Power | W | Current power load Factor | | The.
How to flash Sonoff devices using Arduino UNO Make it More Fun
Programming examples for the Sonoff-MQTT-OTA-Arduino \n TL;DR \n. mosquitto_sub -h mqtt_server_name.com -t stat/my_sonoff/POWER -v # listen for status\nmosquitto_pub -h mqtt_server_name.com -t cmnd/my_sonoff/power -m 1 # turn on the light\n \n General \n.
Sonoff IoT Switch using Mosquitto MQTT and Arduino ESP8266
{"payload":{"allShortcutsEnabled":false,"fileTree":{"sonoff":{"items":[{"name":"_releasenotes.ino","path":"sonoff/_releasenotes.ino","contentType":"file"},{"name.

Arduino & Co Domotics Projects Home Automation System SONOFF and
MQTT for Newbies - arendst/Sonoff-MQTT-OTA-Arduino GitHub Wiki. Notes on MQTT for Newbies MQTT Message flow. Here is a diagram showing the connection phase and the 4 network transactions required to turn a sonoff device on. In a typical setup, you'll have multiple Sonoff's (or other devices using this project's code) on the left hand side..

GitHub arendst/SonoffTasmota Provide ESP8266 based itead Sonoff
Provide ESP8266 based Sonoff by iTead Studio and ElectroDragon IoT Relay with Serial, Web and MQTT control allowing 'Over the Air' or OTA firmware updates using Arduino IDE. Current version is 3.2.13 - See sonoff/_releasenotes.ino for change information.
sonoff LED in next_gen · Issue 282 · arendst/SonoffMQTTOTAArduino
To flash a new firmware to your Sonoff, you have to boot your Sonoff in flashing mode. Follow this 4 step process: 1) Connect your 3.3V FTDI programmer to your computer. 2) Hold down the Sonoff button. 3) Toggle the switch to apply power to the Sonoff circuit. 4) Then, you can release the Sonoff button. Now, your Sonoff should be in flashing.